(1) Add the sample to be injected to the syringe.
A 25µL glass Hamilton syringe is used to inject the GC samples. Only 2-4 µL of sample is injected onto the column, which means that you fill only a small part of the barrel with sample. Examine the syringe carefully before you fill it. The divisions are marked "5 - 10 - 15 - 20 - 25".Place the tip of the needle in the liquid. Slowly draw up a small amount of liquid by raising the plunger, then press on the plunger to expel the liquid back into the liquid. This serves to “rinse” the syringe with your sample, ensuring that what you will measure in the GC run is the composition of your mixture. Repeat the rinse process one or two times. Then, draw up the plunger slowly again while the needle is in the liquid and carefully fill the syringe with liquid about halfway to the “5”
It is often hard to see the liquid in the syringe. If the syringe is clogged, the plunger will be in the correct position but the barrel of the syringe will be filled with only air.
The best thing to do is to carefully examing the syringe after you think that you have filled it. Hold it up to the light to get a better view
Small air bubbles in the syringe will not affect the GC run. As long as there is enough liquid in the syringe, the GC run will work fine. If you keep getting bubbles, just pull the plunger up a bit past the "halfway to the 5" mark to compensate.
If you have a VERY large air bubble, you will not have enough liquid to show a reading on the GC.
(2) Inject the sample into the injector port.
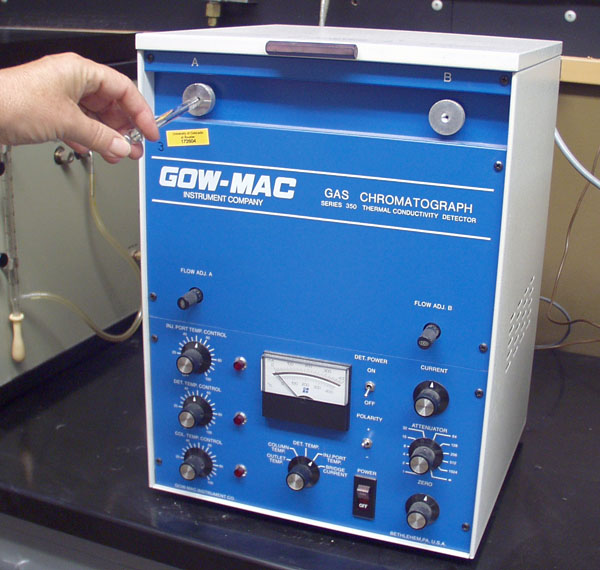
You are need to do two things sequentially and quickly, so make sure you know where the injection port is and where the start button on the recorder is.Push the needle of the syringe through the injection port and immediately press the plunger to inject the sample, then immediately press the start button on the recorder.
You will feel a bit of resistance from the rubber septum in the injection port; this is to be expected and you should be prepared to apply some pressure to the syringe as you force the needle into the instrument all the way to the base of the needle.
(3) Sit back and wait.
Observe the recorder. Within several minutes, it should record several peaks.
(4) End the GC run
When you have seen all of the peaks which you suspect are in the mixture, or when the recorder has shown a flat baseline for a few minutes or so, press stop on the recorder.When you press stop, the recorder will print out the peaks, the retention times, and the areas under the peaks. When it is done printing, you can press “enter” a couple times to advance the paper.
Carefully tear the paper off the recorder. The paper is not perforated, so do not try to pull up and expect it to pop out of the recorder. Instead, pull it down to start a tear from one edge, and then continue the tear until the paper is cut and free
This may seem trivial -- showing you how to tear the paper. But too many times a student has tried to yank the paper out instead of starting a tear and tearing it neatly. Yanking the paper can result in the paper being torn below the plastic cutting surface on the recorder, and the paper gets jammed down inside the recorder.
If this happens, the entire recorder has to be disassembled, a process which takes about 15 minutes, thus putting the entire GC out of service until it can be fixed.
No comments:
Post a Comment